Showing posts with label Lingerie. Show all posts

Saturday, November 18, 2017

Sewing - Copying a RTW Panty!


Having just finished my last bra - a Comexim conversion [check that one out here], I wanted a matching panty to go with it.  Not just any panty but a cute lacy panty in a design I haven't tried before.  Then I came across this panty:

Maison Lejaby Corolle Hipster Panty

Isn't it absolutely gorgeous?

Unfortunately, its also $55!! For one pair of panties!  Unable/unwilling to spend that much on something just to cover my tush, I resolved to make my own.

Fans of the Bunzies or Scrundlewear underwear patterns from Stitch Upon a time, this is the sexier, lacy-ier version. Notice the knit waist band - look familiar?  Back looks pretty similar to the Super Booty cut.


To me, this seemed like a mash up of the ever popular Merckwaerdigh Mix 30 and the Bunzie/Scrundlewear patterns.  Luckily, I have experience with both!  Plus that Sewing Panties by Beverly Johnson on Craftsy on drafting from scratch.


PROCESS

Using your measurements, you create a draft of the perfect fitting underwear tailored to your body.  Yes, there is a bit of math involved (ex. hip x .80 = panties that account of the stretchiness of knit fabric) and you end up with something similar to this:

Not actual underwear schematic - random internet pic
Then add additional seam lines to mimic the look of the RTW undies.  In this case, diagonal seams in the front and vertical seams in the back.   This leave you with the front and back panel mostly complete (just add seam allowance).  You have to tape together the front side and back sides and straighten the bottom where the leg curve normally is to accommodate the lace (remember that straight line is the LOWEST POINT ON LACE).  For the lace pieces only add seam allowance to the sides and not the bottom of the lace - as thats where your lovely scallops will be!  Repeat process with the crotch piece (tape together front and back pieces then add seam allowance).  In the end, you should have a main front piece, main back piece (option to split this down the fold line to create a seam - like the photo.  Just remember to add seam allowance if you do this), side piece (for the lace) and crotch piece.  I did not create a pattern for the knit waistband and just eye balled it.

I'm pretty excited about it.  Also helps that its pretty comfy thanks to the knit waistband!


ISSUES ENCOUNTERED
Since I haven't really worked with lace much, I wasn't as careful as I should have been about ensuring the lace lined up with the fabric.  I had to take out a few seams due to how slippery the fabrics were.   Another issue is that as comfy as the panties are, they FELT lower than I was accustomed to.  Since this was not the first time I've used the panty draft, I know it is EXACTLY the same height, but perhaps due to the lack of elastic, it felt lower and thus a bit less secure.  I'd say for next round, I would reduce the length of the waistband pattern and possibly increase the back rise as well.

And since I was ALREADY sewing with satin and lace, I decided to try an all lace version so popular in stores.


I think it turned out pretty well!  It was actually ridiculously easy to make.  No wonder the lace panties are so popular at Forever 21 and Wet Seal! Maybe 15 minutes? I used the same underwear sloper from the Craftsy class to create this one.  It was my first time using fold over elastic - I've heard some people have a difficult time working with it but it was super easy once you get the hang of it.  Also note the little keyhole in the back.  It was actually the result of my lace being not quite wide enough for the pattern.  I thought about adding a bit of satin in there as others have done but it was so small I thought it might be cute as is.

ISSUES ENCOUNTERED
Similar to above.  Lace + Satin =  slippery little guys that need actual pins to keep in place while overlocking.  I prefer to use my Clover clips when overlocking to avoid any, uh, mishaps at the machine.  However, there was no avoiding it in this case.

Overall, I'm pretty happy with how these two came out.


Tuesday, November 7, 2017

Sewing Bras - Designing a New Style Based on a Well Fitting Pattern (aka Block)

Now that the Costume Season (aka Halloween) is over, lingerie sewing has resumed its full course. Yay!

In my pursuit to further my (bra) education, I've decided to try out a new style with different materials.  As I am not quite ready to completely draft my own patterns from scratch, using a well fitting pattern (aka Block) seemed like a step in the right direction.

I really liked this style of bra: integrated powerbar/lower cups with strap tab with small section of lace upper. Add a few minor tweaks to suite my particular preferences (lower center gore and foam lower cups) and its perfect!
[Cleo Lucy, Gorsenia Marlene, and Freya Arabella]
As I already had a great fitting foam bra pattern (my fabulous Comexim copy - details Here), I used it as my block.  Following the directions from the Bra-Makers Manual (Vol 2) by Beverly Johnson, I ended up with this:


Basically taking the curves off, draw new lines then add curves back on. [You can see a bit of this in action on Erin's Blog Here] A quick muslin (just one cup) then basted into my test band, and we were ready to for final adjustments.

Here's the final!  I'm super spiffed.


THE PROCESS

I cut out the lower cup pieces in cut-and-sew foam and identical pieces in my fashion fabric.  The satin-y material is wonderful under fitted clothing. For the upper pieces, I used a stretch lace from Trim Expo during my last foray into the Fashion District (Nice selection, great prices!). Then cut the same pieces in bra tulle for the lining.  Since I wasn't using a pattern with accompanying instructions, I assembled the pieces together in the order that made the most sense to me. Zig zag foam pieces together then sew lower cup fabric pieces together. Baste tulle and lace together, add tiny elastic for neckline, sew combined upper cup piece to combined lower cup pieces.  Sew just the strap tab portion of the fabric to the foam (right sides of fabric to wrong side of foam) then flip open. With wrong side of fabric facing up (and right side of foam), overlap the fabric and foam a few mm and sew INSIDE the seam allowance.  Flip over and top stitch on the cross seam.  Pin down lower edges of fabric to foam and baste.  Finish as usual.

A few minor tweaks to the band - added a gothic arch and doubled up on the power mesh in the back.  Also some adjustments to accommodate the lace on the back band.


THE FIT

I am pleased to report it fits! [with caveats].  Cups fit wonderfully - a little too good as this is definitely a push up bra w/ lots of cleavage.  Since I used the Comexim pattern, the girls are lifted and centered without the help of any additional padding or internal slings!  The gravity defying shape was created by relatively FLAT cups (the cups gain shape when they conform to the underwire) - contrary to everything I've read about bra making thus far.  Immediate projection at the wire is non-existent - this would normally cause major fitting issues for me but not in this time! The bust point of Comexim bra cups tend to be above my bust point (I believe this is by design) and was also perfect for this particular re-design.


THE PROBLEMS

My myopic focus on the cups had caused some oversight on the band.  1.) I had raised the height of the wide wings (for that super sleek silhouette I crave) but had forgotten to raise the back band as well.  Thus the band only has 3 hooks in the back, caused some lumps and bumps. 2.) I had also doubled the powermesh for the back band AND added stretch lace resulting in significantly less stretch.  Thank goodness I had one of those bra extenders handy! 3.) The shorter back band also made the back straps too far apart. Sigh.


Overall I'm very pleased.


Monday, July 31, 2017

Sewing Bras - Another crack at the Merckwaerdigh Mix 30 bra!

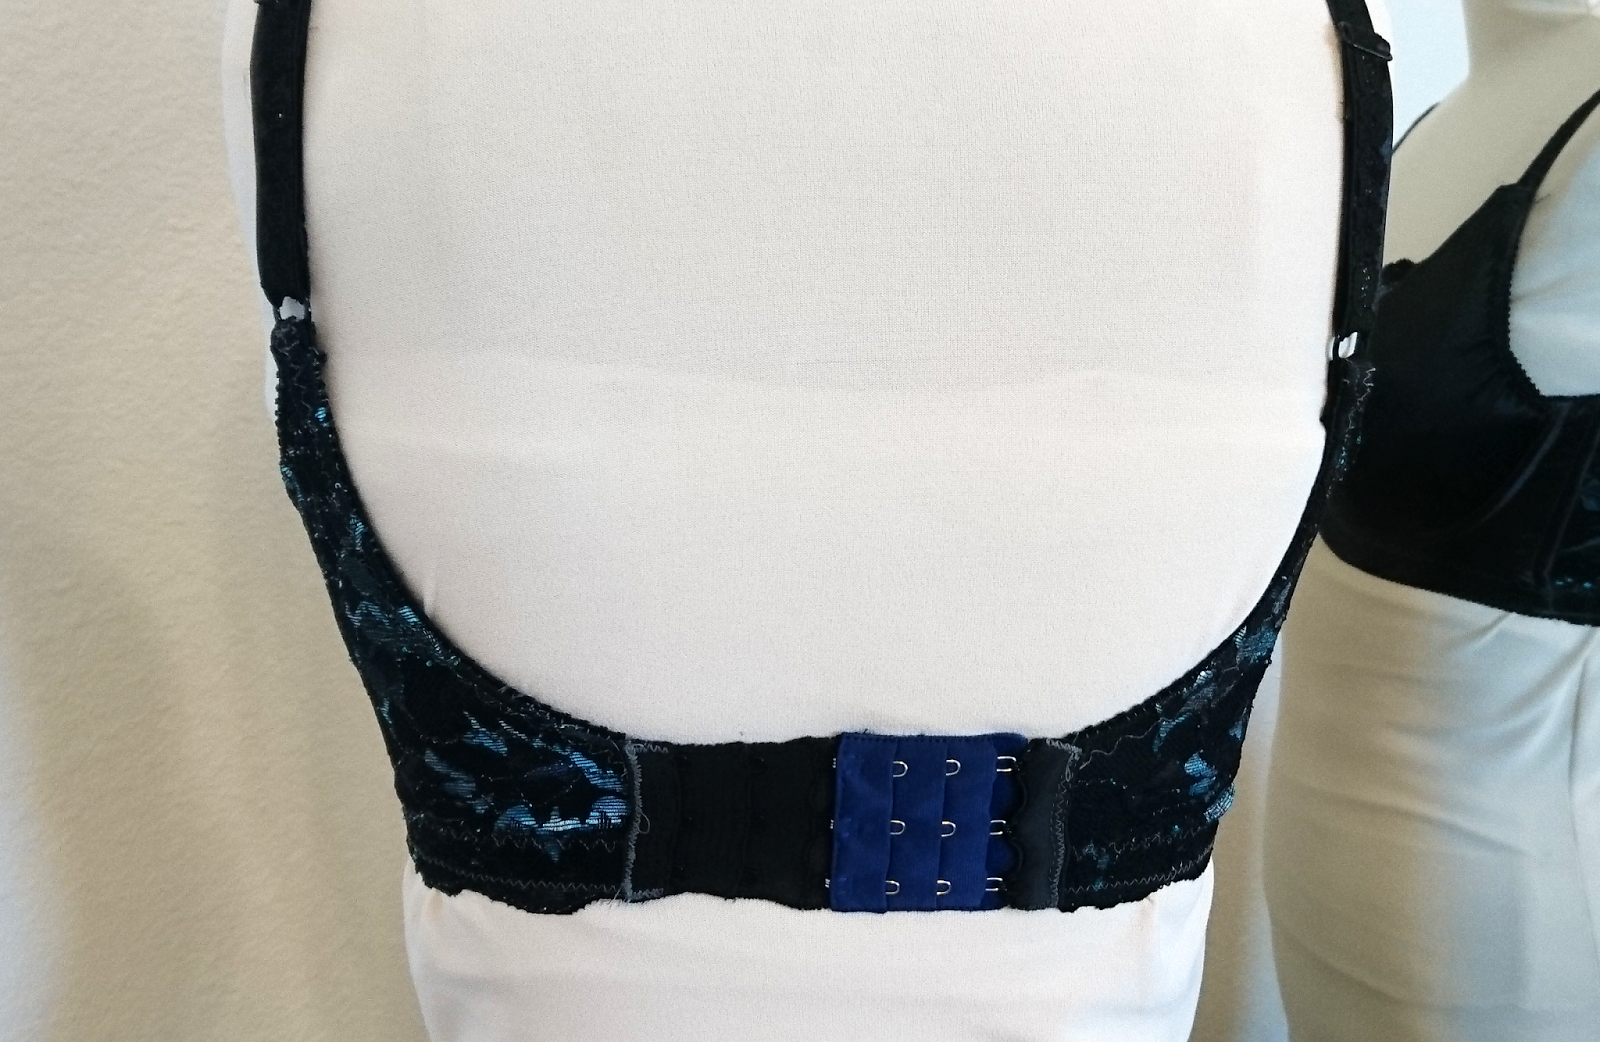
Its done!  The (heavily modified) Merckewaerdigh Mix 30 bra in gorgeous black lace and blue lycra.


Pulled out my old dress form to model my new creation - with the help of some, ahem, enhancements to fill out the bra.


My first attempt using this pattern out of the package didn't go to well and that bra has since been elevated to tester band status. Subsequent attempts to correct said issues yielded much headache due to lack of drafting experience.  See in action below:


Not wanting to just toss it aside, I decided to try to salvage it by redrafting the cups.  It took 5 attempts in muslin before the cups remotely looked like they fit properly. Unfortunately, something was lost in translation when I moved from the muslin to the stretchy cup lining fabric and it became too big. Of course, I didn't discover this until the bra was 90% complete.  After dragging my feet on it for a week or two (and trying a few other small adjustments in hope I didn't have to take the cups apart completely) I finally gave in and redid the cups.

I determined that the outer cups can remain (and should remain) unchanged but the inner cups was drafted in a way where the top of the cups were TOO open (complete opposite of the problem I had the first time!).  So after taking apart the seams, I went ahead and reduced the curvature of the inner cup piece from the apex up.  For the most part, it worked.  Just still a tad too projected for me at the moment (post weaning).  Also the back band is tighter than usual - likely because the blue lycra doesn't have quite as much stretch as the powernet.  It will likely just sit in the drawer.  What does one do with {perfectly good, new} me-made bras that don't fit?  Anyone interested in a giveaway? Approximately 30FF - great for someone who's narrow set, with lots of projection.


Sunday, July 2, 2017

The Long Awaited Satami Bra Review!

Its here!  Its finally here!  Satami has graciously sent me a few bras to review after I inquired about their bras availability here in the US.

The long awaited bras from Satami and my accompanying review.


Aren't they gorgeous?  We have the Lace Minimizer Soft Cup Bra (2180) in Smoky Black on the left and Non-Wired Sports Bra (2198) in Blue on the right.  

Lace Minimizer Soft Cup Bra (2180)
The Lace Minimizer Soft Cup Bra (2180) has a few misnomers.  First of all, its not a "minimizer" in the traditional (American) sense.   This bra DOES NOT minimize the size or look of breasts in ANY way shape or form.  Its called a Minimizer because of the the overall slimming effect it has on the body (think silhouette) by smoothing out back and/or underarm fat.  More details on that below.  The second misnomer is the "soft cup" - make no mistake, this is an UNDERWIRED bra with lightly lined fabric cups (ie. soft).

DESIGN AND STYLE
Typical to Asian style bras, this plunge bra pushes the girls up and together (even with the padding removed).  One feels supported and *shock* slimmer!  Thanks to the extra wide band, there is ZERO and I mean ZERO back fat, or underarm fat.  The sleek silhouette is addicting.  Its akin to wearing shapewear that also happens to be a bra.  To help keep everything in place is a 4 row, 4 column hook and eye in the back.  The bra also features an ultra low center gores so common in Asian bras (low when compared to Panach or Freya, only 'medium' low within the Satami line) - a haven for us narrow set ladies - and 3/4 cup (aka demi?).  [Need a primer on Asian bras? Check out my first Satami post here.] The straps are fixed and NOT fully adjustable.  For this reason, it may not work for those with tall roots.  [Need a primer on the vocab? Try the ABTF Glossary]  True to design, the 2-ply "Wincool" powernet seems to do the job.  I wore this bra (padding removed) to an Amusement Park on a 90+ degree day and did not feel like the girls were suffocating.  Speaking of which, the padding feels pretty great too - a bit like memory foam but I have not tried wearing them.  The side wings have 2 pieces of boning on each side for extra support - not uncomfortable - they contribute significantly to the support of the band (I learned of their importance first hand during my foray in to sewing my first bra).  Lastly, I do want to mention that while there was no chafing after a full day of wearing this bra (12+ hours) there was a bit of irritation under the arms due to the high side wings.  This is likely due to my higher levels of activity and extra long hours of wearing - it is unlikely for someone to experience this during a typical day at the office.

FIT
My normal size in European brands like Panache or Freya is 32F (sometimes 32E as I'm loosing weight).  In Satami, I wear a 34G.  Per the Satami website, you can go up a cup size for more coverage.  After a few 12+ hour days of wearing this bra, I can say with some confidence that if you are accustomed to wearing Polish bras like Comexim IN YOUR NORMAL BAND SIZE, order your normal band size.  For example, I wear a 70H (equivalent to 32 band) in Comexim but it IS a bit tight and great for days when I'm feeling thin and not bloated.  Basically, first thing in the morning before any type of meal.  I do feel like a 32 band would have sufficed for me BUT I am accustomed to wearing tighter bands and wear tightlacing corsets occasionally.  For most of us though, going up a band size is going to be more comfortable.  The wires are comfortably in my IMF, although pretty high on the sides due to the higher side wings.  Thankfully, the wires are also pretty soft so not uncomfortable.  Center gore tacks nicely and the wide set straps stay put on my sloped shoulders.  As I briefly mentioned before, the straps are NOT fully adjustable and fill likely suffice for those with Short Roots.  Those with tall roots may need to replace the plush elastic portion with a longer section - not a difficult fix if you're handy with needle and thread.  I have short roots and had to "let out" the elastic practically to the max...

CONCLUSION
I really like this bra!  Its pretty comfy despite the higher wires, extra boning and extra wide band.  There was very little (if any) fidgeting while wearing and my silhouette looked awesome.  Girls were up front and center while being supported.  Its the Asian equivalent of the holy grail Polish bras - from the tighter bands, overall shape the cups provide and needing to size up in the cups.  Oh, and it passed the chasing after toddlers, walking up and down the stairs test. =)  Full disclosure though, I'm FoB, not center-full and my breast tissue is still pretty firm. I think these style of bras - low center gore, plunge, shallow-ish cups work REALLY WELL with those whose shape is more shallow or FoB.


Non-Wired Sports Bra (2198)
The Non-Wired Sports Bra is as beautiful as any of their regular bras.  Gorgeous detailing and a 4 hook clasp in the back for ease.  However, the most SURPRISING aspect of this Sports Bra is how pushed up and forward the girls are - all without the help of any boning or wires.  Unlike most wireless bras that are compression based, this bra by some miracle, supports without smooshing the girls against your chest. Like their regular bra line, this sports bra also features a plunge - although not as deep - just enough to glimpse a bit of cleavage. Add this to your rotation for those days at barre class, yoga, power walking or other light exercise.  Its comfortable to wear lounging around the house and the saleswoman at the Personal Touch Store also mentioned its a great sleep bra!


DESIGN AND STYLE
Like Satami's regular bras, the Wireless Sport Bra also features extra wide bands and plunge center.  The bra looks deceivingly shallow until you put it on.  Materials are light and airy but substantial enough to be supportive.  The cup portion of the bra comes up pretty high (as in elastic straps start 1 inch before my shoulder) but not uncomfortable. Unlike the typical wireless sports bras we find in the US, the cups are NOT made of stretchy material designed to compress the girls against your chest.  The cups are made of the same material as their regular bras - thus the feeling of structured support without wires or boning.  Like Satami's other bras, the back features a 4 row - 4 column clasp for ease.  The band is a single layer of powernet to guarantee breathability during those workouts!  

FIT
As mentioned above, my usual size in UK brands is 32F.  Satami sent me a 34E in this style and it still fits comfortably as its sister size to my usual - no need to size up here!  This makes complete sense as Satami uses UK sizing [bit of history here - HK was once a part of the British Empire for those that remember]. 

CONCLUSION
Great bra for lounging around the house, sleeping and light physical activity.  Although I have not worn this one yet, I can easily foresee wearing this around the house, sleeping and/or while pregnant!

Friday, June 9, 2017

Bra Sewing - My Very First Me-Made Bra! MAYA by AFI Atelier

After MUCH anticipation, my shipment of bra making supplies finally arrived!  Unfortunately, the bra pattern I ordered did not.  What is one to do?  Why search online for a free pattern of course!

Thus, the MAYA Bra Pattern from AFI Atelier


This free bra pattern has an amazing size range - 28AA to 44H (UK)!!

Prior to diving into my precious bra making supplies, I decided to make a muslin or bra toile to check the fit.  There is an excellent trial run bra tutorial at Cloth Habit.  I highly recommend it as I made not one but TWO trial run bras.


As a lingerie sewing novice, I found the instructions that accompanied the Maya bra to be sufficient.  I did some more "research" while I was waiting for the supplies to arrive and felt fairly confident to just dive in.  Mostly the tutorials from Make Bra to supplement the **almost** complete instructions from AFI.

Why 2 bra muslins?  The first one (32F) turned out to be too big in the cups - so I went back to the AFI site and downloaded the 32E.  Since I already had a teeny bit of experience sewing bra cups from the first muslin, I went ahead and made a few changes for round two.  I'm fairly narrow set so I took in the center gore - at lot, lowered center gore and graded the cups to match, and widened the back band to better mirror my favorite bras.


A few key take aways:
- Double up on the lightweight powermesh (likely unnecessary if using regular powermesh)
- shorten band further as it fits like a 34
- slightly too much immediate projection at the wire 
- Shorten underwire as the shortening the center gore also shortened the wire channeling.

Overall, pretty comfy!  Cups fit pretty well - center gore tacks and doesn't jab me in the chest.  This creates more of a "natural" silhouette.  I may make another one - but wireless to use as a sleep bra!


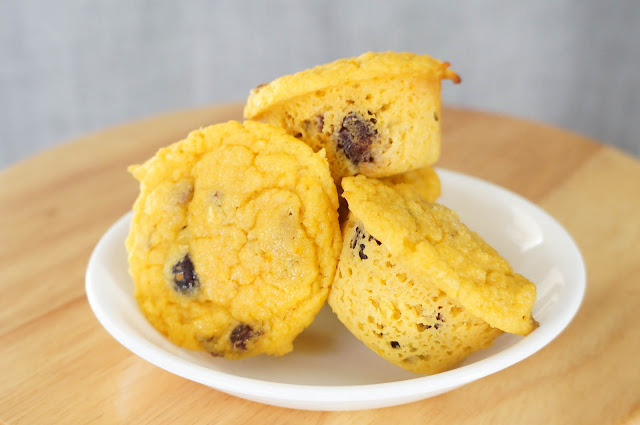
Recipe - Keto Fresh Orange Cranberry Muffin Recipe

After a VERY long break, we're back!  We're re-dedicating this blog to all mommy related things - minus the bra making track.  Bra m...