Thursday, November 30, 2017

Recipe - Sweet Rye Bread

In all the years I've owned our Vitamix blender, I've had a variety of uses for the multipurpose tool: muffins, pao de queijo,  blending soups, nut butters, Nutella, ice cream, apple sauce and powdered sugar.  While I've ground my fair share of almond meal for baking, I've never actually used it on grains for flour.  Its been in the back of my mind for some time - freshly milled grains for fresh baked bread. I've heard it also tastes much better as "wheat flour loses 40% of its vitamin content in the first 24 hours after milling and 85-90% after 2-3 more days" [source1] and [source2].  In essence, freshly milled grains taste better and are better for you.  Enough said.


After purchasing some Rye Berries on whim (it was on sale!) I decided on this recipe: Sweet Rye Bread based on the fact I had all the ingredients on hand.  I had to make some minor changes (molasses instead of sorghum syrup and store bought wheat flour) but delicious all the same.  


As for the milling itself - it was pretty simple.  I used the Vitamix dry container and dumped a cup in at a time.  I wasn't sure about the volume as how much you can pour into the container often depends on the oil and hardness of the ingredient (in general, less for nuts, more for grains and even more for sugar.) but one cup seemed to work well for the rye. Remember one cup of grains makes a little more than a cup of flour.  I did not sift and in hindsight, that may have been a good idea (perhaps I should have researched milling a bit more before jumping in!).


INGREDIENTS


  • 1 1/2 cups warm water
  • 2 1/2 teaspoons dry active yeast
  • 1/4 cup dark brown sugar
  • 1/4 cup of oil (or melted butter)
  • 1/2 cup sorghum syrup
  • 1 tablespoon salt
  • 2 cups rye flour
  • 2 to 3 cups unbleached all purpose or wheat

INSTRUCTIONS

  1. In the bowl of a stand mixer combine the water, yeast, and sweetener- give a quick stir and let sit until yeast becomes active, 5 to 10 minutes.
  2. Stir in oil, sorghum, salt, and rye flour. Start bread with the dough hook.
  3. Add 1/2 cup of all purpose flour and continue to slowly add flour (1-2 tablespoons at a time) until dough pulls away from the side of the bowl. Let run for 8-10 minutes. This will give you time to adjust flour and let the dough knead. Remember- you can always add flour but you can’t always take it away. The dough should be soft and slightly sticky. Cover with a damp towel and set aside to rise for 1to 1 1/2 hours.
  4. Once the first rise is over, knead a couple of times into the form of a log. Place in an oiled bread pan, cover again and set aside for about 1 hour. With 30 minutes left, pre-heat your oven to 350˚ F.
  5. Once the loaf has risen the second time, place in oven. (if you have a bottle of water, mist the bottom of your oven a couple of times to get some steam going.) Shut the oven door and let bake for 20 minutes. Cover with a brown paper bag and continue to bake for another 30-40 minutes. Bread should have a golden crust and sound hollow when you tap on the bottom. Remove bread from pan and let cool before slicing.
by 

Saturday, November 18, 2017

Sewing - Copying a RTW Panty!


Having just finished my last bra - a Comexim conversion [check that one out here], I wanted a matching panty to go with it.  Not just any panty but a cute lacy panty in a design I haven't tried before.  Then I came across this panty:

Maison Lejaby Corolle Hipster Panty

Isn't it absolutely gorgeous?

Unfortunately, its also $55!! For one pair of panties!  Unable/unwilling to spend that much on something just to cover my tush, I resolved to make my own.

Fans of the Bunzies or Scrundlewear underwear patterns from Stitch Upon a time, this is the sexier, lacy-ier version. Notice the knit waist band - look familiar?  Back looks pretty similar to the Super Booty cut.


To me, this seemed like a mash up of the ever popular Merckwaerdigh Mix 30 and the Bunzie/Scrundlewear patterns.  Luckily, I have experience with both!  Plus that Sewing Panties by Beverly Johnson on Craftsy on drafting from scratch.


PROCESS

Using your measurements, you create a draft of the perfect fitting underwear tailored to your body.  Yes, there is a bit of math involved (ex. hip x .80 = panties that account of the stretchiness of knit fabric) and you end up with something similar to this:

Not actual underwear schematic - random internet pic
Then add additional seam lines to mimic the look of the RTW undies.  In this case, diagonal seams in the front and vertical seams in the back.   This leave you with the front and back panel mostly complete (just add seam allowance).  You have to tape together the front side and back sides and straighten the bottom where the leg curve normally is to accommodate the lace (remember that straight line is the LOWEST POINT ON LACE).  For the lace pieces only add seam allowance to the sides and not the bottom of the lace - as thats where your lovely scallops will be!  Repeat process with the crotch piece (tape together front and back pieces then add seam allowance).  In the end, you should have a main front piece, main back piece (option to split this down the fold line to create a seam - like the photo.  Just remember to add seam allowance if you do this), side piece (for the lace) and crotch piece.  I did not create a pattern for the knit waistband and just eye balled it.

I'm pretty excited about it.  Also helps that its pretty comfy thanks to the knit waistband!


ISSUES ENCOUNTERED
Since I haven't really worked with lace much, I wasn't as careful as I should have been about ensuring the lace lined up with the fabric.  I had to take out a few seams due to how slippery the fabrics were.   Another issue is that as comfy as the panties are, they FELT lower than I was accustomed to.  Since this was not the first time I've used the panty draft, I know it is EXACTLY the same height, but perhaps due to the lack of elastic, it felt lower and thus a bit less secure.  I'd say for next round, I would reduce the length of the waistband pattern and possibly increase the back rise as well.

And since I was ALREADY sewing with satin and lace, I decided to try an all lace version so popular in stores.


I think it turned out pretty well!  It was actually ridiculously easy to make.  No wonder the lace panties are so popular at Forever 21 and Wet Seal! Maybe 15 minutes? I used the same underwear sloper from the Craftsy class to create this one.  It was my first time using fold over elastic - I've heard some people have a difficult time working with it but it was super easy once you get the hang of it.  Also note the little keyhole in the back.  It was actually the result of my lace being not quite wide enough for the pattern.  I thought about adding a bit of satin in there as others have done but it was so small I thought it might be cute as is.

ISSUES ENCOUNTERED
Similar to above.  Lace + Satin =  slippery little guys that need actual pins to keep in place while overlocking.  I prefer to use my Clover clips when overlocking to avoid any, uh, mishaps at the machine.  However, there was no avoiding it in this case.

Overall, I'm pretty happy with how these two came out.


Wednesday, November 15, 2017

Momofuku Crack Pie Recipe

After a recent French Macaron Order, I was left with 10 (count them, TEN) egg yolks. [Get a glimpse of what I made here.]  I normally try to use them in in a delectable French Buttercream or delicious Japanese style pudding (aka Flan) but neither recipes would use up anywhere near 10 yolks (unless I made double or triple batches!!).  So after a quick Google search, I came upon the Momofuku Crack Pie.  Never having been to the Momofuku Milk Bar in which the pie originates but I've had a friends version one Thanksgiving - and remember going back for seconds.  Who are we kidding - it was thirds...  They don't call it Crack Pie for nothing!


LINK to recipe here.

Make no mistake, this is not quick bake by any means.  AND.... This is about as healthy as deep fried butter rolled in bacon bits and topped with Vanilla Ice Cream.  BUT oh man, is it delicious. The Momofuku Crack Pie seems to be on the same wavelength as Chess Pie - on crack.  [pun intended!]  So save yourself the $50 or so and spend a few hours making your own.


Look at that ooey gooey goodness on the inside!  An entire GIANT oatmeal cookie as the crust, lots of brown sugar and butter = total awesomeness.  Oh, did I mention the recipe makes TWO pies?  One to keep and one as gift - be the office hero.  They will be begging for more.  Promise.

Tuesday, November 7, 2017

Sewing Bras - Designing a New Style Based on a Well Fitting Pattern (aka Block)

Now that the Costume Season (aka Halloween) is over, lingerie sewing has resumed its full course. Yay!

In my pursuit to further my (bra) education, I've decided to try out a new style with different materials.  As I am not quite ready to completely draft my own patterns from scratch, using a well fitting pattern (aka Block) seemed like a step in the right direction.

I really liked this style of bra: integrated powerbar/lower cups with strap tab with small section of lace upper. Add a few minor tweaks to suite my particular preferences (lower center gore and foam lower cups) and its perfect!
[Cleo Lucy, Gorsenia Marlene, and Freya Arabella]
As I already had a great fitting foam bra pattern (my fabulous Comexim copy - details Here), I used it as my block.  Following the directions from the Bra-Makers Manual (Vol 2) by Beverly Johnson, I ended up with this:


Basically taking the curves off, draw new lines then add curves back on. [You can see a bit of this in action on Erin's Blog Here] A quick muslin (just one cup) then basted into my test band, and we were ready to for final adjustments.

Here's the final!  I'm super spiffed.


THE PROCESS

I cut out the lower cup pieces in cut-and-sew foam and identical pieces in my fashion fabric.  The satin-y material is wonderful under fitted clothing. For the upper pieces, I used a stretch lace from Trim Expo during my last foray into the Fashion District (Nice selection, great prices!). Then cut the same pieces in bra tulle for the lining.  Since I wasn't using a pattern with accompanying instructions, I assembled the pieces together in the order that made the most sense to me. Zig zag foam pieces together then sew lower cup fabric pieces together. Baste tulle and lace together, add tiny elastic for neckline, sew combined upper cup piece to combined lower cup pieces.  Sew just the strap tab portion of the fabric to the foam (right sides of fabric to wrong side of foam) then flip open. With wrong side of fabric facing up (and right side of foam), overlap the fabric and foam a few mm and sew INSIDE the seam allowance.  Flip over and top stitch on the cross seam.  Pin down lower edges of fabric to foam and baste.  Finish as usual.

A few minor tweaks to the band - added a gothic arch and doubled up on the power mesh in the back.  Also some adjustments to accommodate the lace on the back band.


THE FIT

I am pleased to report it fits! [with caveats].  Cups fit wonderfully - a little too good as this is definitely a push up bra w/ lots of cleavage.  Since I used the Comexim pattern, the girls are lifted and centered without the help of any additional padding or internal slings!  The gravity defying shape was created by relatively FLAT cups (the cups gain shape when they conform to the underwire) - contrary to everything I've read about bra making thus far.  Immediate projection at the wire is non-existent - this would normally cause major fitting issues for me but not in this time! The bust point of Comexim bra cups tend to be above my bust point (I believe this is by design) and was also perfect for this particular re-design.


THE PROBLEMS

My myopic focus on the cups had caused some oversight on the band.  1.) I had raised the height of the wide wings (for that super sleek silhouette I crave) but had forgotten to raise the back band as well.  Thus the band only has 3 hooks in the back, caused some lumps and bumps. 2.) I had also doubled the powermesh for the back band AND added stretch lace resulting in significantly less stretch.  Thank goodness I had one of those bra extenders handy! 3.) The shorter back band also made the back straps too far apart. Sigh.


Overall I'm very pleased.


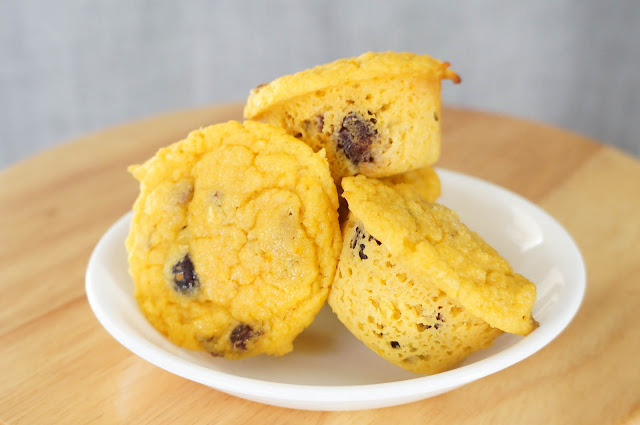
Recipe - Keto Fresh Orange Cranberry Muffin Recipe

After a VERY long break, we're back!  We're re-dedicating this blog to all mommy related things - minus the bra making track.  Bra m...